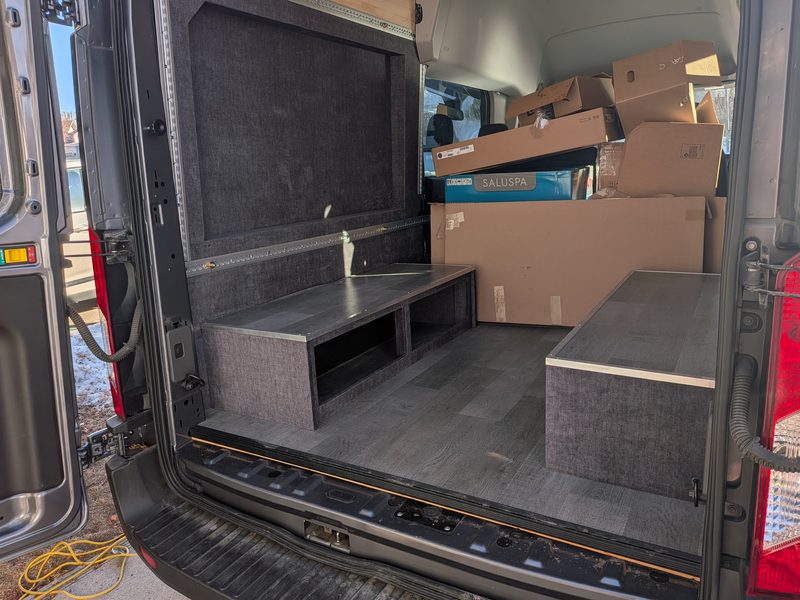
We have not touched a piece of lumber yet. Before we do, we are building the whole interior of our 2022 Ford Transit in cardboard.
Watch: Link will be here once the video is ready. Click here to be notified.
Before you cut anything permanent, build it wrong on purpose. Use cardboard. Tape it together. Stand in it. Sit in it. Open every door and drawer.
This is the step most people skip. It is also why most van builds have at least one thing the builder would redo if they could.
For a family of four converting a short-wheelbase Transit with four sleeping modes (see Quad-Mode Layout), skipping this step is not an option. The tolerances are too tight. The penalty for getting it wrong is too expensive.
What cardboard actually tells you
Paper plans lie. Not on purpose. They cannot simulate your body moving through a space.
You need to know:
Will the fridge door open? Sounds obvious. Until you build the cabinet around it and find out it swings into the counter edge. Cardboard catches that. A finished cabinet does not.
Will the drawers clear the bed platform? Again, obvious on a sketch. Less obvious when you have four things within two inches of each other and tolerances stack.
Does the space feel right? There is no formula for this. You have to stand in it. A galley that looks generous at 24 inches on paper can feel cramped at 24 inches in real life when there is a wall behind you and a counter in front.
Will things actually fit? The Scopema swivel seat. The fridge. The inverter. The water tank. The hydronic boiler. Every component has dimensions on a spec sheet and different dimensions once you account for clearance, cable routing, and access for maintenance. Measure twice, cut once is old advice. Build in cardboard first, then measure, then cut.
Will the modes actually switch? The cardboard mockup is the only way to confirm Mode 1 (daily driver), Mode 2 (day trip), Mode 3 (two-person camping), and Mode 4 (four-person camping) all coexist in the same physical space. We walked through each mode in the cardboard van before committing to a single permanent cut.
Why bother
A sheet of plywood costs $80 to $100 in Canada right now. A piece of cardboard costs nothing.
The bigger cost is time. Cutting a piece of plywood wrong costs you the wood and the time. Building a drawer unit that blocks a door costs you a weekend of tear-out plus whatever the lumber cost. Getting the galley position wrong before you have run your water lines costs you everything downstream.
The cardboard phase feels slow. It is not. It is the fastest way through the build because it eliminates the backtracking.
We are doing it before we commit to anything. Layout, cabinet heights, bed length, walkway width, the hydronic loop routing under the floor. All of it gets verified before a single permanent cut.
What we are testing
We have not finished the mockup yet. When we do, we will update this with what we found. That is how this site works. We document what actually happened, not what we planned.
The list of things we expect to learn from cardboard:
- Whether the bench-seat-to-bed transition actually clears the wheel wells
- Whether the galley counter is at a usable height with the floor stack already accounted for (see Floor Strategy)
- Whether the kids can climb into Mode 4 (four-person sleeping) without elbowing each other
- Whether the wet zone access panel can open in every mode
- Whether two adults can change clothes in Mode 3 without choreography
- Whether the cooler fits the spot we drew on the sketch
We expect at least three of those tests to fail the first time. That is the point.
How to do this yourself
If you are at this stage and waiting for us to finish ours, do not.
Grab boxes from a recycling bin or hardware store. A utility knife with fresh blades (see the Parts Bin for the locking-blade knife we use). A roll of duct tape. A measuring tape. A friend or family member to help hold pieces in place while you mark.
Build full-size. Not scale models. Stand in it. Sit in it. Pretend it is raining outside and you have to get the kids dressed inside the cardboard van. Pretend it is 6 a.m. and you do not want to wake the second adult while you make coffee.
The mockup is not pretty. Yours will fall over. Cats will sit in it. That is fine. The mockup is information, not a finished product.
The sooner you are standing in your cardboard van, the fewer regrets you will have when it is built.
Next up: Weight Balance. What the cardboard mockup cannot test, and why every plywood decision after this point gets weighed in kilograms.
More from BuildaVan:
- Series start: Think Twice: Our Philosophy
- Previous: Transit Crew Walkaround (the van itself)
- Next: Weight Balance, Quad-Mode Layout, Floor Strategy
- Related: Parts Bin (tools used in the mockup)
Some links on this site are affiliate links. If you purchase through them, we may earn a small commission at no extra cost to you. See our affiliate disclosure.
Updated with real findings after we complete the mockup.